What is NDT

What is NDT
NDT stands for non-destructive testing. In other words, it is a way of testing without destroying. This
means that the component- the casting, weld or forging, can continue to be used and that the non
the destructive testing method has done no harm.
In today’s world where new materials are being developed, older materials and bonding methods are
being subjected to higher pressures and loads, NDT ensures that materials can continue to operate to
their highest capacity with the assurance that they will not fail within predetermined time limits.
NDT can be used to ensure the quality right from raw material stage through fabrication and
processing to pre-service and in-service inspection.
Apart from ensuring the structural integrity, quality and reliability of components and plants, today
NDT finds extensive applications for condition monitoring, residual life assessment, energy audit,
etc.
There are many NDT techniques/methods used, depending on four main criteria:
· Material Type
· Defect Type
· Defect Size
· Defect Location
Common NDT Methods
Volumetric Examination Method
Ultrasonic Testing -UT
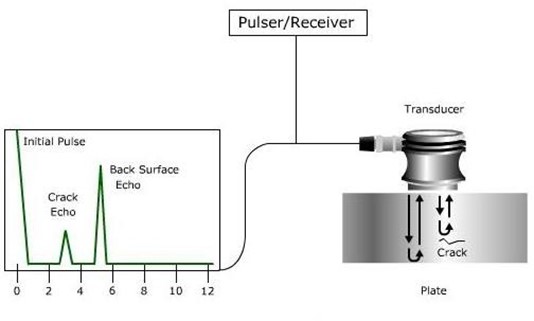
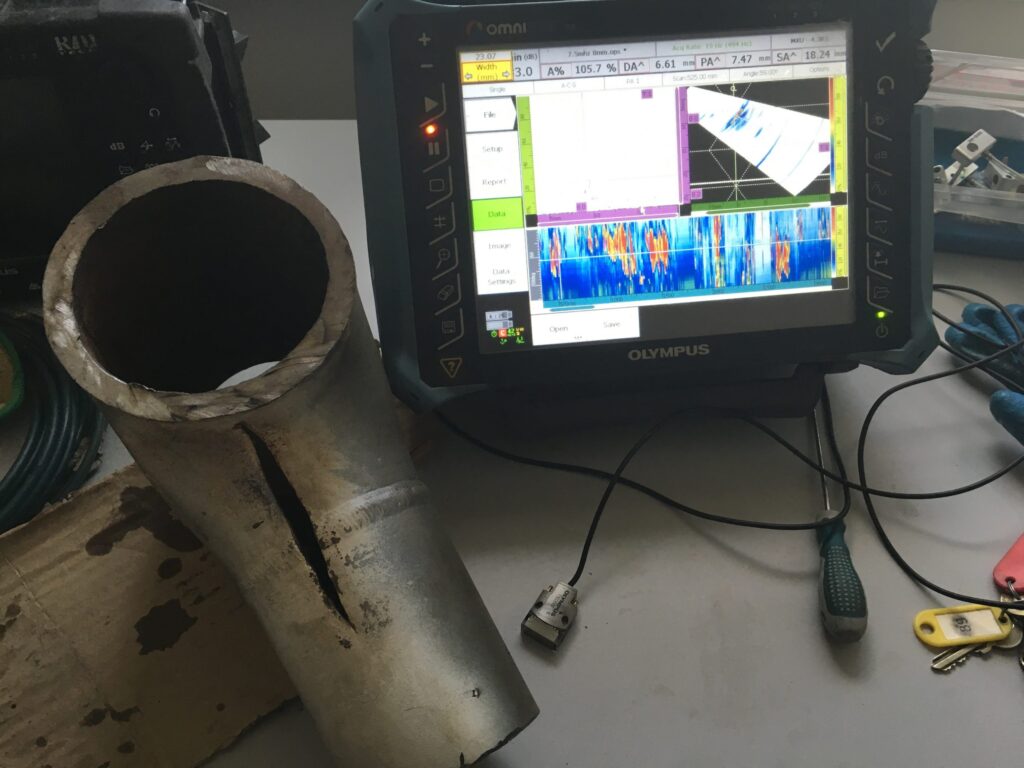
Ultrasonic inspection uses high frequency sound waves to detect imperfections or changes in
properties within the materials. It can also be used to measure the thickness of a wide range of
metallic and non-metallic materials where access from one side only is available.
Radiography Testing -RT
Radiography uses an x-ray device or radioactive isotope as a source of radiation which passes through
the material and is captured on film or digital device. After processing the film an image of varying
density is obtained. Possible imperfections are identified through density changes.
Surface Examination Method
Visual Inspection -VT
The oldest of all the methods. Components are scanned visually, sometimes with the aid of low or
high power lenses, fibrescopes, cameras and video equipment, to determine surface condition.
Liquid Penetrant -PT
In Liquid Penetrant the test object or material is coated with a visible or fluorescent dye solution. The
excess dye is removed from the surface and a developer which acts like a blotter is applied drawing
penetrant out of imperfections open to the surface. With visible dyes, the vivid colour contrast
between the penetrant and the developer is used. With fluorescent dyes an ultraviolet lamp is used to
make the ‘bleed out’ fluoresce brightly allowing the imperfection to be seen readily
Magnetic Particle -MT
Magnetic Particle inspection is used to identify surface and near surface discontinuities in
ferromagnetic materials such as steel and iron. The technique uses the principle that magnetic lines of
force (flux) will be distorted by the presence of a discontinuity. Discontinuities (for example, cracks)
are located from the flux distortion following the application of fine magnetic particles to the area
under test.
Eddy Current -ET
In eddy current testing electrical currents are generated in a conductive material by an induced
magnetic field. Distortions in the flow of the electric current (eddy currents) caused by imperfections
or changes in a material’s conductive properties will cause changes in the induced magnetic field.
These changes, when detected, indicate the presence of the imperfection or change in the test
material.
Integrity Examination Method
Leak Testing -LT
Leaks can be detected by using electronic listening devices, pressure gauge measurements, liquid and
gas penetrant techniques or a simple soap-bubble test. Several techniques are used to detect and locate
leaks in pressure retaining components such as pressure vessels and pipelines
Acoustic Emission Testing-AET
When a solid material is stressed, growing imperfections, if any within the material emit short bursts
of acoustic energy called “emissions”. As in ultrasonic testing, acoustic emissions can be detected by
special receivers. Emission sources can be evaluated through the study of their intensity, rate and
other characteristics. The growing defects can be located by triangulation technique (similar to
earthquake epicenter location)
Condition Monitoring Method
Thermography – Infrared Testing – IR
Thermography enables the thermal profile of an item, machine or building to be presented in a
graphic form which allows a working temperature assessment to be derived. From this, variations in
the material or component temperature are identified, enabling working limits or corrective actions to
be identified.
Vibration Analysis – VA
The rotary machines produce vibration noise. By monitoring the frequency, amplitude etc. of the
vibration the condition of the machine can be estimated.
Special NDT methods
NDT engineers and technicians also use magnetic resonance imaging, vibration monitoring, laser
ultrasonics, holography, computed tomography as well as many other specialized methods for
specialized applications
A Career in NDT
Careers can be in a variety of areas:
· Service Inspection Companies
· Smelters & Foundries
· Rolling & Forging Mills
· Petro Chemical & Refineries
· Mining & Mineral Processing
· Aircraft Maintenance & Manufacturing
· Vehicle Maintenance & Manufacturing
· Engineering Firms
· Research & Development Facilities
· Education & Training
· Equipment Manufacture & Sales
· Maintenance, Service & Repair of Equipment


