Understanding The Essentials Of PAUT Inspection Techniques

In the world of inspections, detecting hidden flaws or cracks in materials is a bit like finding a needle in a haystack. It’s challenging and requires precision. Perhaps you’ve heard about an advanced technique called Phased Array Ultrasonic Testing (PAUT) but feel swamped by the technical jargon surrounding it? Well, here’s a fact that might grab your attention: PAUT can scan complex geometries and provide detailed imaging of internal defects, making it an indispensable tool in industries far and wide.
This blog post simplifies the essentials of PAUT inspection techniques for you. Whether you’re a professional looking to enhance your understanding or just curious about this cutting-edge technology, we’ll break down how it works, its pros and cons, applications, and much more—all without drowning you in too much detail.
Let’s dive right into the heart of discovering what makes PAUT stand out among other inspection methods. Ready to explore?.
Key Takeaways
- PAUT uses sound waves and multiple ultrasonic elements to find flaws in materials, making inspections faster and more accurate.
- It’s a versatile method used across various industries such as aerospace and oil, offering detailed imaging for assessing complex geometries and ensuring safety.
- While PAUT provides many benefits like improved flaw detection and quicker inspection times, it also requires skilled operators and can be costly to implement.
- The technology involves advanced techniques such as the Total Focusing Method (TFM) for enhanced precision, broadening its application in quality control checks.
- Despite challenges like its complexity and initial cost, PAUT remains a crucial tool in non – destructive testing due to its reliability and efficiency in detecting internal defects.
Overview of Phased Array Ultrasonic Testing (PAUT)

Phased Array Ultrasonic Testing, or PAUT, is a game-changer in the world of non-destructive testing. It uses cutting-edge technology to peek inside materials and structures, spotting flaws that could cause trouble down the line.
What is it?
Phased Array Ultrasonic Testing, or PAUT, stands as a top-tier NDT (Non-Destructive Testing) technique. It shines in spotting flaws like cracks, voids, and corrosion without damaging the equipment.
Through its use of ultrasonic waves, PAUT delves deep into materials to reveal what’s hidden inside.
This method relies on multiple ultrasonic elements and clever electronic timing to create detailed images of internal structures. Industries across the board have taken note – from aerospace to oil and gas – making PAUT crucial for ensuring safety and reliability in critical assets.
Its ability to detect pits and other damages helps maintain high standards in process equipment operations.
How does it work?
Moving from the basics of what Phased Array Ultrasonics (PAUT) is, we delve into how this innovative technique operates. PAUT uses a set of ultrasonic testing probes. These probes are unique because they contain multiple ultrasonic elements.
Each element can generate ultrasound waves that help in inspecting materials for defects.
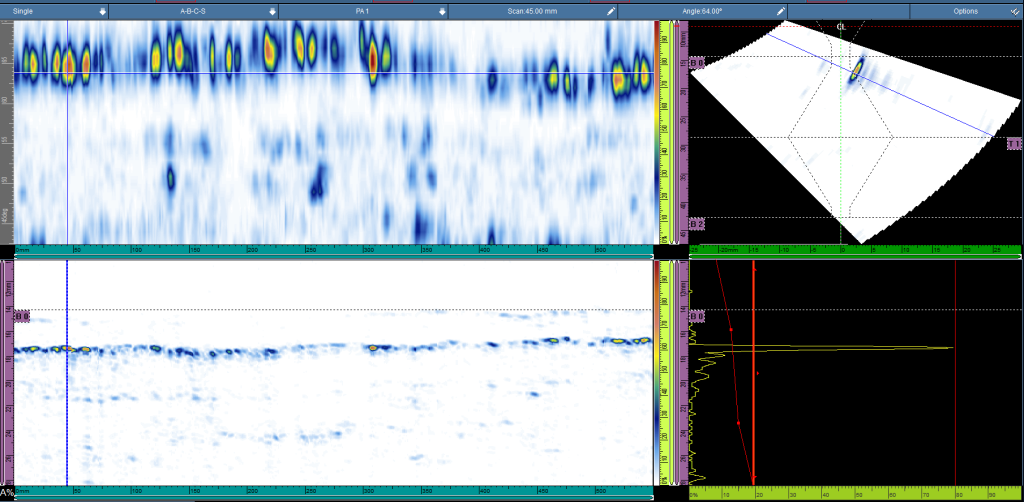
The system relies on electronic time delays to focus and steer the ultrasound beams across the material being inspected. This method creates detailed images of the inside of materials, allowing for precise detection and characterization of internal defects.
The flexibility in beam control makes it possible to inspect complex shapes and sizes, broadening its applicability in various industries.
Advantages and disadvantages
Exploring the realm of Phased Array Ultrasonic Testing (PAUT), it’s essential to weigh its advantages and disadvantages carefully. This balanced view helps understand why PAUT has become a go-to inspection method, yet also acknowledges its limitations. Let’s delve into this comparison.
| Advantages | Disadvantages |
|---|---|
| Simplified inspection and interpretation | Applicability |
| Increased flaw detection | Complexity |
| Faster inspection speeds | Cost |
| More reliable results | |
| Ability to inspect complex geometry |
PAUT’s prowess in detecting flaws that might escape other methods is a proven advantage, heightened by its faster inspection times and reliable outcomes. The technology simplifies inspections and provides insightful interpretations. Moreover, its capacity to assess complex geometries ensures critical assets are thoroughly examined.
However, challenges exist. The specific applicability of PAUT means it may not be suitable for all situations. Its complexity demands skilled operators, and the initial cost might deter smaller operations. These factors should be weighed when considering the adoption of PAUT.
How PAUT Works

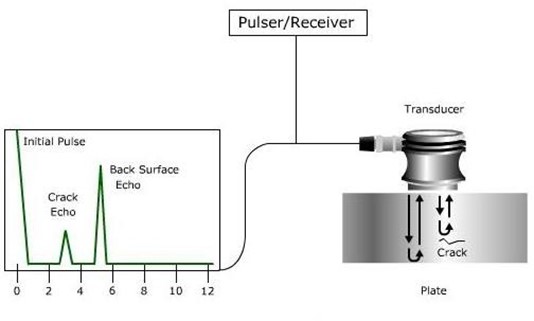
PAUT beams sound waves at different angles into a material, capturing echoes to reveal hidden flaws. This technique allows experts to see inside objects without cutting them open, making it a smart choice for safety checks and quality control.
Total Focusing Method (TFM)
The Total Focusing Method (TFM) sharpens the accuracy and reliability of Phased Array Ultrasonic Testing (PAUT) scans. By focusing at every point in a region of interest, TFM harnesses synthetic focalisation to achieve clear, detailed images.
This method builds on conventional PAUT’s steering and focusing techniques but enhances them significantly. Its application involves basic phased array principles that elevate inspection quality.
TFM is a leap forward for PAUT technology, offering unparalleled precision in detecting flaws and inconsistencies within materials. This technique allows inspectors to carry out their tasks with greater confidence, thanks to the improved clarity and depth of information it provides.
The focus on each part of the scanned area ensures no detail is missed, making inspections more thorough and reliable.
Electronic scanning
Moving from the precision of Total Focusing Method (TFM), electronic scanning introduces another level of control in PAUT inspection techniques. It manipulates ultrasound beams with finesse, using multiple ultrasonic elements.
These elements steer and shape the beam along a linear pattern. This process allows for detailed examination of materials without physical movement of the transducer.
Electronic scanning breaks down into three main types that adjust how we see beneath surfaces. Each type controls the beam in unique ways to spot flaws other methods might miss. Through this technique, inspections become more thorough, ensuring safer structures and machinery.
Sector scanning
Sector scanning in PAUT involves the use of electronic arrays to finely inspect materials. This technique allows for a sweeping motion across the target area, covering different angles from a fixed point.
It’s like having multiple probes looking at the same spot but from various perspectives, making sure nothing gets missed.
This approach is especially useful because it creates detailed images of the internal structure without moving physically. Think of it as using a flashlight to illuminate every corner of a dark room from where you stand, ensuring thorough examination.
Now let’s explore how this technology brings benefits such as quicker inspections and more accurate findings into play in our next section on the advantages of PAUT.
Advantages of PAUT
PAUT boosts accuracy and speed in inspections, making it a game-changer for many industries. Curious to discover more? Keep reading!
Simplified inspection and interpretation
PAUT makes it easier for technicians to look at the results and understand what they see. This advanced NDE technique breaks down complex data into simpler forms. Pictures and diagrams help show where problems might be, which means decisions can be made faster and more confidently.
Inspecting materials and structures gets a lot smoother with PAUT. Technicians don’t need to spend as much time figuring things out because the system does a lot of the heavy lifting.
Clearer images lead to better detection of flaws, making sure nothing important is missed. It’s all about getting accurate information quickly, so solutions can be put in place right away.
Increased flaw detection
Moving beyond simplified inspection, we delve into the realm of increased flaw detection. This stands as a core advantage of Phased Array Ultrasonic Testing (PAUT). It excels at uncovering hidden defects that other methods might miss.
Imagine being able to spot cracks, voids, and pits caused by corrosion with pinpoint accuracy. That’s exactly what PAUT offers. Its sophisticated technology focuses signals in a way that traditional ultrasonic methods can’t match.
This heightened ability to detect flaws ensures safety and reliability across various industries. From aerospace to oil and gas, it’s all about catching issues before they escalate into major problems.
The precision of PAUT means fewer oversights and more peace of mind for engineers and safety managers alike. It truly transforms how critical assets are inspected, making it easier to safeguard both equipment and lives.
Faster inspection speeds
PAUT technology boosts inspection speeds significantly, making it a game-changer in the field. Traditional ultrasonic testing methods take longer because they scan one area at a time.
With PAUT, multiple angles and areas get checked all at once. This means quicker scans and more ground covered in less time.
Inspectors can now finish their work faster thanks to this speed advantage. This efficiency doesn’t just save time—it reduces downtime for machinery being inspected, which is crucial in industries where every minute counts.
Faster inspections with PAUT lead to more efficient operations overall, keeping projects on schedule and under budget.
More reliable results
Eliminating mechanical scanning, PAUT enhances reliability in inspection results. It focuses signals more accurately than conventional methods. This precision allows for detecting flaws with greater efficiency and confidence.
Shifting to PAUT sets a new standard over traditional ultrasonic testing by focusing on the reliability and effectiveness of inspections. The technology’s ability to adapt and focus increases its comparative advantage, making it a superior choice for thorough examinations.
Disadvantages of PAUT
PAUT isn’t perfect, and it brings hurdles along the way. From its steep learning curve to the hefty price tag, these are points worth pondering.
Applicability
Phased Array Ultrasonic Testing (PAUT) shines in weld inspection, where it detects cracks, porosity, and lack of fusion with precision. Its ability to handle complex geometries makes it a go-to for industries aiming for top-notch quality control.
From aerospace to oil and gas, companies rely on PAUT’s advanced capabilities to ensure safety and efficiency.
This technique isn’t limited to just one or two sectors; its versatility extends across various fields. Whether it’s checking the integrity of process equipment or investigating structural components in manufacturing, PAUT provides reliable insights that help maintain high standards.
With its broad applicability, this method continues to play a critical role in maintaining operational excellence across numerous industries.
Complexity
Moving from applicability to another crucial aspect, complexity plays a significant role in PAUT inspection techniques. The method involves the use of multiple ultrasonic elements and electronic time delays to create ultrasound beams.
This process is not straightforward and demands a strong understanding of both the technology and its application. Inspectors often face challenges due to this intricate system, where expertise is essential for accurate results.
This complexity isn’t just about operating equipment; it also extends to interpreting the data gathered during inspections. It requires skilled professionals who can decipher complex signals and make informed decisions based on them.
Despite these challenges, mastering PAUT allows inspectors to detect flaws with high precision, making it a valuable tool in maintaining safety standards across various industries.
Cost
PAUT systems demand a higher initial outlay than conventional ultrasonic testing setups. This is due to their advanced features which, while offering enhanced inspection capabilities, come with an increased price tag.
Investing in PAUT equipment and skilled personnel can considerably add to the costs, making it pricier compared to standard ultrasonics.
Despite these expenses, the long-term benefits of using PAUT—such as improved flaw detection and faster inspection times—often justify the investment for many industries. The requirement for sophisticated knowledge and practical expertise further contributes to the overall cost.
Yet, this technology’s adoption continues to grow across various sectors due to its undeniable advantages in non-destructive testing.
Next up: Applications
Applications
PAUT shines across many industries, from aerospace to oil pipelines, pushing boundaries and setting new standards for safety and efficiency—dive in to uncover how it’s reshaping inspections.
Industry uses for PAUT
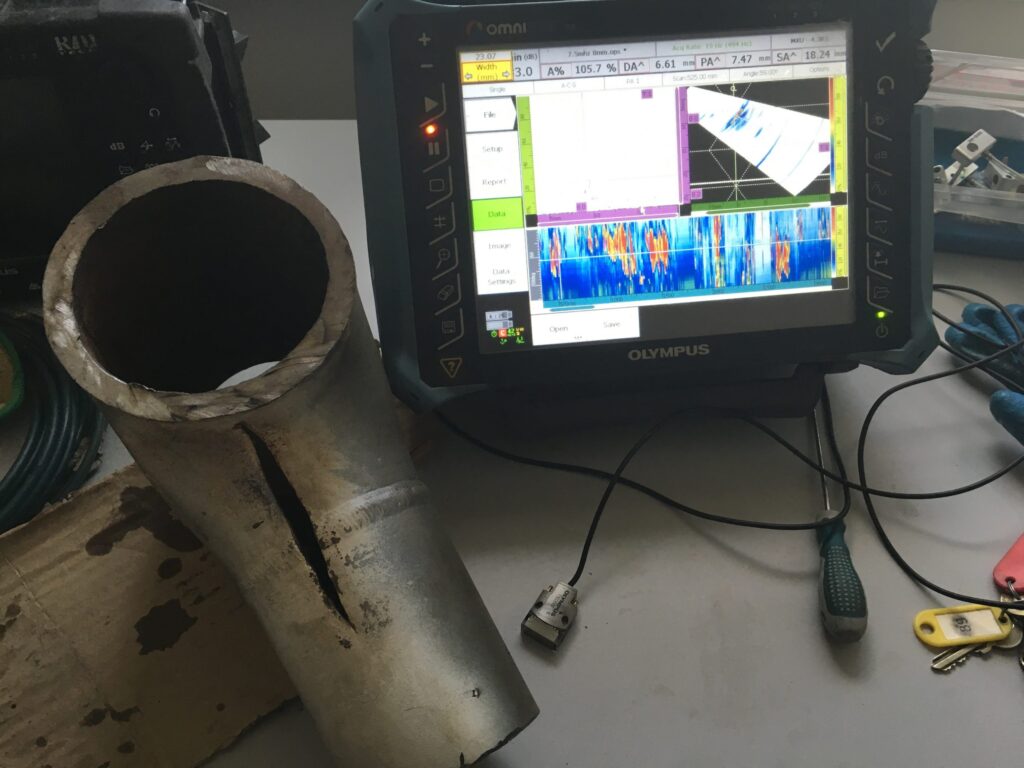
Industries like oil and aerospace depend heavily on PAUT for inspecting critical assets. This technique shines in assessing complicated welds and evaluating composite materials. It excels at uncovering defects that could compromise safety, such as cracks or voids hidden beneath surfaces.
Experts trust it for ensuring the integrity of vital structures.
PAUT proves indispensable in corrosion monitoring and wall thickness measurements across various sectors. It’s particularly adept at detecting pits and flaws caused by corrosion, safeguarding process equipment from unexpected failures.
This ability makes it a key player in maintaining operational efficiency and preventing costly downtimes in industries where precision matters the most.
Notable examples of applications
PAUT shines in the oil and gas sector, identifying cracks in pipelines and tanks that could lead to catastrophic failures. This method ensures the safety of operations and prevents environmental disasters by catching flaws before they become serious problems.
It’s a powerful tool, reinforced by its compliance with ASME code for advanced ultrasonic testing methods, making it a trusted choice in this high-stakes industry.
In aerospace, PAUT is crucial for inspecting aircraft components. The technique spots defects in critical parts like engine components or fuselage structures where failure is not an option.
Its ability to provide more efficient and accurate testing than conventional methods makes it invaluable for maintaining the high safety standards required in aviation. This non-destructive testing method safeguards both passengers’ lives and costly equipment without causing any damage, highlighting its utility across various applications where reliability cannot be compromised.
Phased Array Ultrasound Transducer
A phased array ultrasound transducer is a powerful tool that splits sound waves into multiple angles, enhancing inspection accuracy—dive deeper to unveil its full potential.
Definition
Phased Array Ultrasonic Testing, or PAUT, is a method that uses a set of ultrasonic testing probes to spot flaws in materials. These probes create sound waves that bounce off defects back to the sensor, telling us where and what the problems are.
It’s like having super-vision for finding cracks inside stuff without breaking it open.
This technique stands out because it packs multiple ultrasonic elements into one device. Each element can be controlled separately, making it possible to steer sound beams in different directions or focus them on specific spots.
This flexibility lets inspectors get a detailed look at the material they’re checking, ensuring nothing nasty is lurking beneath the surface unnoticed.
Components and function
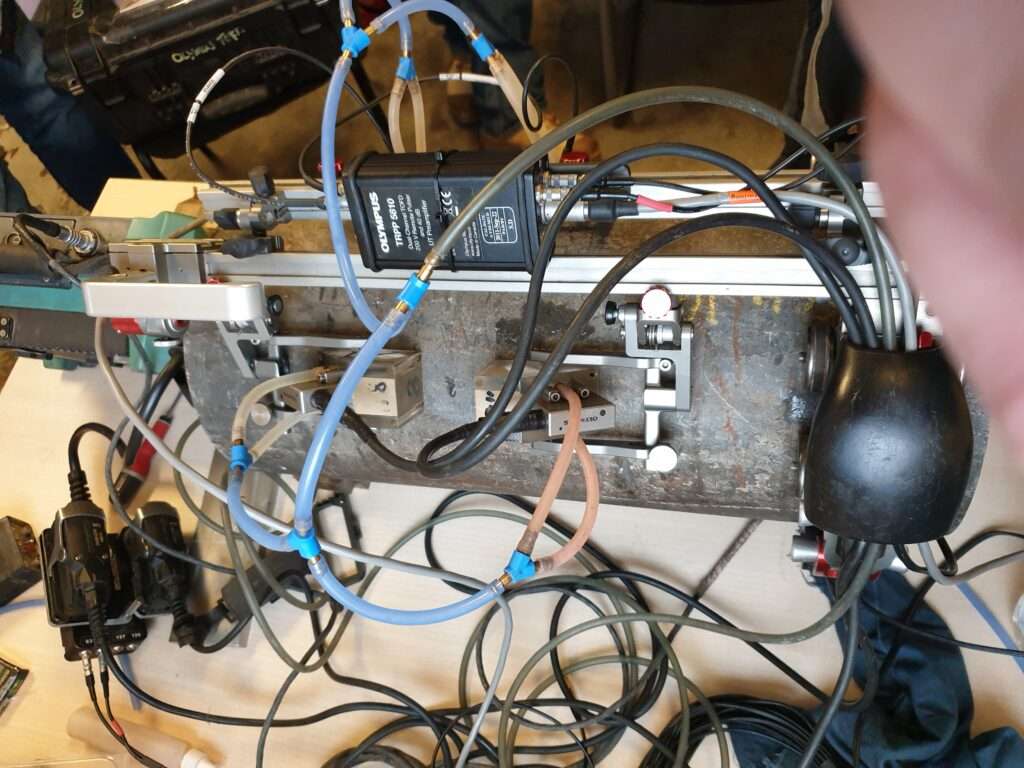
A phased array ultrasound transducer is at the heart of PAUT. It houses multiple elements, each capable of generating and receiving ultrasound waves. These elements are carefully arranged in an array within the probe or transducer, enabling precise control over the wave’s direction and angle.
This setup allows for electronic time delays between each element’s emissions, creating focused beams that can scan a component in fine detail.
The function of these components revolves around manipulating ultrasonic waves to inspect materials without causing any damage. Thanks to the electronic time delays, operators can steer, focus, and sweep the beam across a wide area swiftly and with great precision.
This enables more thorough inspections than traditional methods allow as it provides detailed images of internal structures. The ability to adjust parameters in real time enhances flaw detection rates significantly while speeding up the inspection process overall.
Common misconceptions about PAUT
Many believe PAUT is only for finding cracks. This isn’t true. It can also spot weld defects like lack of fusion and porosity, showing its versatility in inspections. People often think PAUT uses just one ultrasonic element.
In fact, it employs multiple elements with electronic time delays to produce detailed scans.
Some folks wrongly assume PAUT can’t handle surface defect detection well. However, while not its primary focus, PAUT still offers useful insights into surface issues under certain conditions.
Another myth is that PAUT’s capabilities are limited when actually it provides sensitive optimisation and real-time imaging for a thorough examination.
Conclusion
Diving into PAUT inspection techniques opens up a world of precise defect detection and analysis. It’s clear that this tech brings together speed, reliability, and detailed imaging under one roof.
From aerospace to automotive sectors, its applications shine through, pushing the boundaries of material inspection. With every scan, PAUT proves itself as an indispensable ally in maintaining safety and integrity across various industries.
After all, understanding the essentials lights the path to mastering these critical inspections.


Responses