PAUT Procedure sample
Free download for logged in users.
PHASED ARRAY ULTRASONIC TESTING WORK PROCEDURE
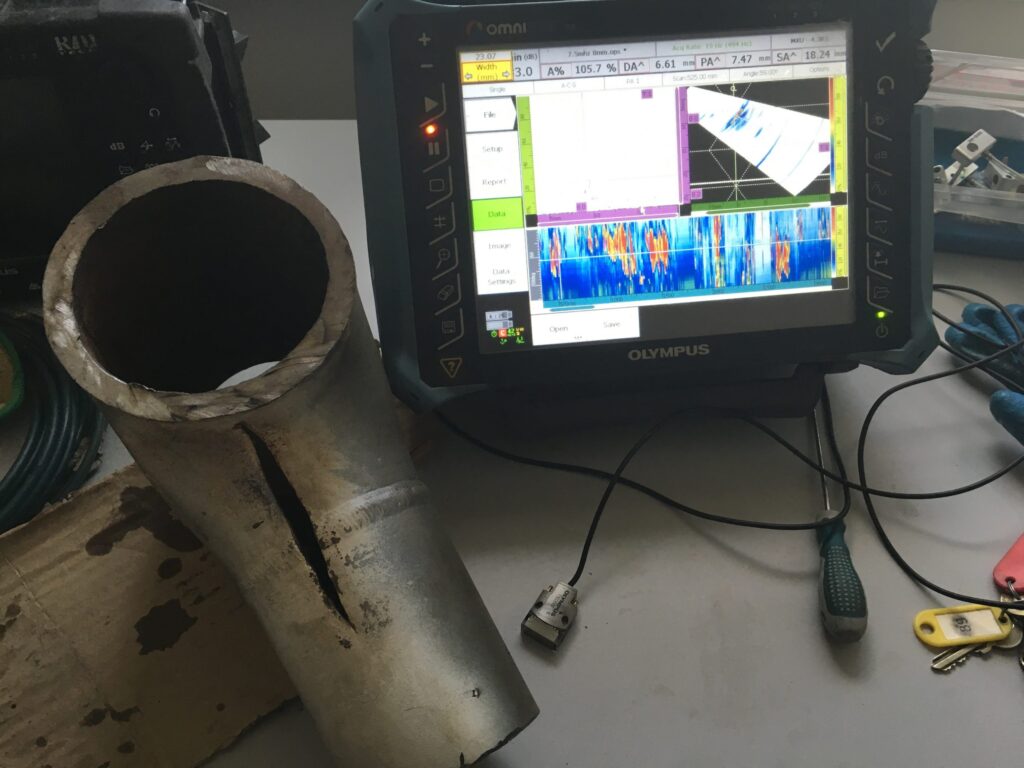
This instruction provides guidelines to perform phased array ultrasonic inspection that normally required by project using ISONIC 2009/2010 Phased Array System.
SCOPE
This instruction is to describe requirements for performing phased array ultrasonic inspection of the material and full penetration welds accordance with ASME V and Code Case. This is to be used for detecting, locating and evaluating indication within the welds and heat affected zone using manual contact inspection technique.
QUALIFICATION
Personal shall be qualified and competence to carry out the task. Personnel performing Ultrasonic Examination in accordance with this procedure shall be qualified and certified with at least level II in Phased Array Ultrasound Testing.
RESPONSIBILTIES
The PAUT examiner shall be able to carry out the task as per the inspection guideline according to code or recommended practice.
DEFINITIONS
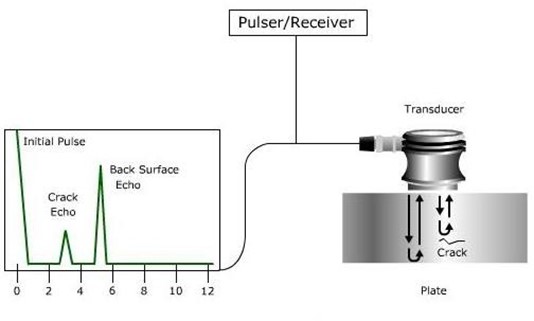
Phased array systems pulse and receive from multiple elements of an array. These elements are pulsed in such a way as to cause multiple beam components to combine with each other and form a single wave front traveling in the desired direction. Similarly, the receiver function combines the input from multiple elements into a single presentation.
Because phasing technology permits electronic beam shaping and steering, it is possible to generate a vast number of different ultrasonic beam profiles from a single probe assembly, and this beam steering can be dynamically programmed to create electronic scan
Doc : | ||
Revision No: 01 |
REFERENCE/CALIBRATION BLOCK.
- International Institute of Welding Ultrasonic Reference Block Type-I (IIW V1)
- IOW Beam Profile Block
- ASME Basic Calibration Blocks
- For examination of circumferential and longitudinal welds in materials with contact surface curvatures greater than 20 inches in diameter, flat basic calibration blocks shall be used.
- For materials with contact surface curvatures of 20 inches and less, in diameter, the basic calibration block shall be curved. A single curved basic calibration block may be used to calibrate the examination on contact surfaces in the range of curvature from 0.9 to 1.5 times the basic calibration block diameter.
- Basic Calibration for piping shall be a section of pipe of the same nominal size and schedule.
QUALIFICATION BLOCK
- Qualification block shall be completed for all thicknesses and material inspected in accordance with the requirements of project
- Welds shall be manufactured with simulated flaws on the fusion faces of sizes as required by the code case, EDM notches may be utilized for top and bottom defects with a width of 0.2mm
- A record of qualification block shall be, maintained and validation documents shall be submitted for client review and shall form part of the final documentation package
- Blocks shall be deemed acceptable if the sample block shows defect ratios smaller or equal to those required in the ASME code case acceptance criteria.
PHASED ARRAY CALIBRATION
- Calibration shall be performed from the surface of the calibration block which corresponds to the component surface to be examined.
- System calibration shall include the complete ultrasonic examination system. System calibration instructions will be outlined in the specific Ultrasonic Technical Instruction Phased Array. Screen distance calibration shall be at least 1 and ½ veepaths for the minimum angle that will be used during the examination, unless otherwise specified.
Doc No: | ||
Revision No: 01 |
- During scanning, only the gain may be adjusted. Adjustment of other controls shall require recalibration.
- Focal Law Verification
- The transmission and reception of ultrasonic waves of a given angle of incidence is a function of time delays calculated by focal laws using the information provided to the phased array system. Verification that the input information is correct and that the phased array system is working properly must be checked.
- Select the Angle Cursor and adjust its position so that it displays A-scan information for the 40o angle of refraction or the minimum angle that will be used in the Sector Scan.
- Using the 4-inch radius on the IIW block, peak the signal shown on the A scan display.
Note: Although the sector scan may indicate higher amplitude responses from Other angles, only use the A-scan response associated with the 40o angle of propagation.
- Indicate on the transducer wedge, the beam exit point. This beam exit location is only valid for the 40o angle of propagation.
- Using the primary angle of beam refraction exit location, measure the actual angle of propagation by peaking the response in the A-scan display using the plexi-glass insert on the IIW block. Record the actual angle of propagation as indicated on the IIW block using the beam exit point location.
- If the measured angle of propagation is 40o +/- 2o, then critical focal law Parameters are correct.
- If the measured angle of propagation is outside the allowable tolerance (40o +/- 2o), then all transducer and setup parameters must be reviewed for accuracy. If these parameters are correct, then check the shear wave velocity value used for the material. If this is correct, then small adjustments must be made to the transducer wedge velocity entry. If the measured angle is too high, then the wedge velocity must be increased slightly, and repeated. Similarly, if the measured angle is too low, then the wedge velocity parameter must be lowered and repeated until the measured angle is within tolerance.
Doc No: | ||
Revision No: 01 |
INSPECTION
- Contact Surfaces – The finished contact surface should be free from weld spatter and any roughness that would interfere with free movement of the search unit or impair the transmission of ultrasonic vibrations.
- Weld Surfaces – The weld surface should be free of irregularities that could mask or cause reflections from defects to go undetected and should merge smoothly into the adjacent base materials.
- The specifics of the examination volume, weld identification and location will be identified in the Scan Plan. The Scan Plan will demonstrate by plotting or with computer simulation the examination angles, 35 to 80 degree will be used during the examination.
- Datum 00 or North direction is starting point and scanning will be clockwise direction. Scanning will be performed using Sectorial Phased Array scan.
- Scanning speed shall not exceed 10mm/sec. Each scanning will be recorded for 300mm length.
- Perform the examination from two sides of the weld, where practical, or from one side as a minimum. All examination volume limitations shall be documented on the Phased Array report
ACCEPTANCE CRITERIA
Acceptance criteria accordance with ASME Code Case 2235 Rev 9 or ASME Code Case 181 or equivalent with Client’s Standards.
REPORTING
- All test performed shall be recorded in the proper reports with the following information included:-
- Project Title/Job Number
- Pipe identification
- Specification for Acceptance
- Equipment Used
- Result of test
- Name, signature of tester
- Date of test
- All reports will attach with isometric or general drawing provide.
- Copies of approved report will be presented to client
Doc No: | ||
Revision No: 01 |
Attachment 1:
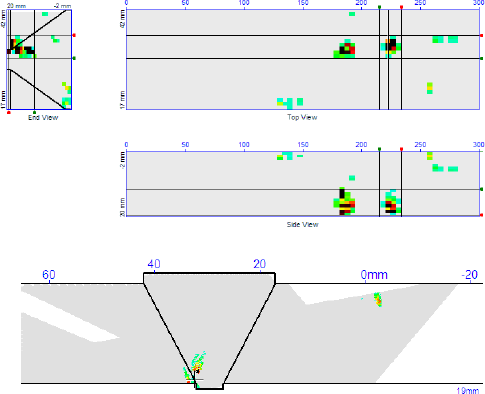
Scanned sample with toe crack defect
Doc No: | ||
Revision No: 01 |
Isonic 2010 Inspection Parameter
Test Parameters Date: 9-Aug-2012 Emitter Skip #: 1.0 Receiver Skip #: 1.0
Thickness Correction: ON Thickness: 19.0 mm
BASICS:
Gain=42 dB Reject=0%
US Velocity=3209 m/s
Range=50.0 mm Display Delay=13.64 µs
PULSER:
Pulser Mode=SINGLE PRF=2000 Hz
Pulse Width=100 ns
Firing Level=5
GATE A:
aSwitch=ON
aThreshold=10% aStart=12 mm aWidth=65.7 mm
RECEIVER:
Filter=ON
Filter Low=0 MHz Filter High=6.6 MHz Display=FULL
DAC/TCG:
DAC Mode=TCG
DAC Curve=Curve OFF
MEASURE:
Probe Delay=13.64 µs Meas Mode=Flank
EMIT:
Start=1
Aperture=32 Incidence Angle=55.0 ° Focal Depth=0 mm
RECEIVE:
Start=1
Aperture=32 Incidence Angle=55.0 ° Focal Depth=0 mm
Inspection Parameters: Probe Position = 17.0 mm Weld Width = 25.0 mm
Cap Offset = 2.0 mm
Bottom Weld Width = 5.0 mm Root Offset = 2.0 mm
Min Angle=40.0 ° Max Angle=80.0 °
Angle Increment=0.5 °
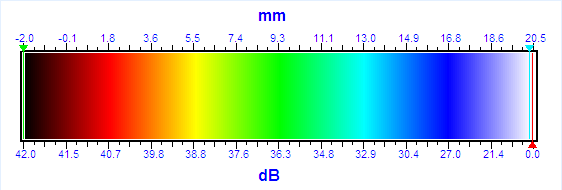
LEGEND:
Doc No: | ||
Revision No: 01 |
ISONIC 2010
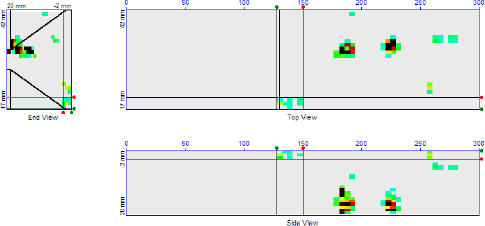
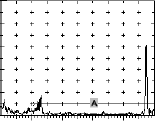
Inspection Report – Defect 1(Toe Crack)

Length | Width | Height |
Lr = 150.0 mm | Xr = 19.9 mm | Dr = 0.9 mm |
Lg = 127.6 mm | Xg = 17.0 mm | Dg = 2.0 mm |
∆L = 22.4 mm | ∆X = 2.9 mm | ∆D = 2.9 mm |
Doc No: | ||
Revision No: 01 |
ISONIC 2010
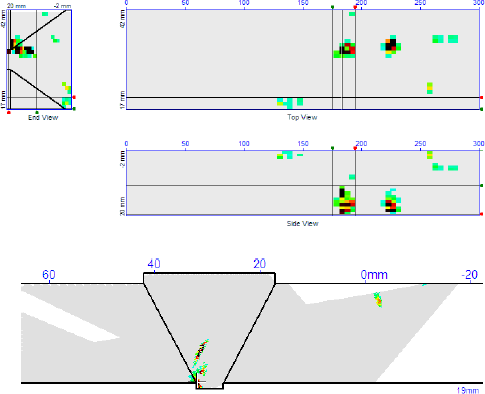
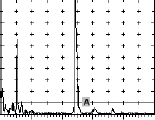
Inspection Report – Defect 2 (LOP)
Length | Width | Height |
Lr = 194.2 mm | Xr = 19.9 mm | Dr = 19.8 mm |
Lg = 175.1 mm | Xg = 17.0 mm | Dg = 9.9 mm |
∆L = 19.1 mm | ∆X = 2.9 mm | ∆D = 9.7 mm |
Doc No: | ||
Revision No: 01 |
ISONIC 2010
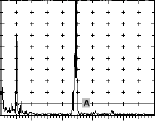
Inspection Report – Defect 3 (LOP)

Length | Width | Height |
Lr = 233.5 mm | Xr = 35.5 mm | Dr = 19.6 mm |
Lg = 214.9 mm | Xg = 29.7 mm | Dg = 10.8 mm |
∆L = 18.5 mm | ∆X = 5.8 mm | ∆D = 8.8 mm |
Doc No: | ||
Revision No: 01 |
ISONIC 2010
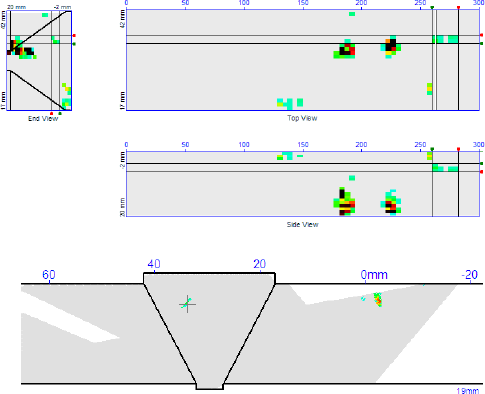
Inspection Report – Defect 4 (LOF)
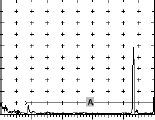
Length | Width | Height |
Lr = 282.0 mm | Xr = 35.7 mm | Dr = 4.8 mm |
Lg = 259.6 mm | Xg = 33.6 mm | Dg = 2.0 mm |
∆L = 22.4 mm | ∆X = 2.1 mm | ∆D = 2.9 mm |
Doc No: | ||
Revision No: 01 |
Attachment 2:
Sample of Lamination Check Using Delay Line
Doc No: | ||
Revision No: 01 |
ISONIC 2010
Inspection Parameter
Test Parameters Date: 9-Aug-2012 Emitter Skip #: 0.5 Receiver Skip #: 0.5
Thickness Correction: ON Thickness: 20.0 mm
BASICS:
Gain=43 dB Reject=0%
US Velocity=5960 m/s
Range=20.1 mm Display Delay=17.58 µs
PULSER:
Pulser Mode=SINGLE PRF=1500 Hz
Pulse Width=100 ns
Firing Level=5
GATE A:
aSwitch=ON aThreshold=10%
aStart=10 mm aWidth=10.1 mm
RECEIVER:
Filter=OFF
Filter Low=0 MHz
Filter High=20 MHz Display=FULL
DAC/TCG:
DAC Mode=OFF
DAC Curve=Curve OFF
MEASURE:
Probe Delay=17.58 µs Meas Mode=Top
EMIT:
Start=1 Aperture=32
Incidence Angle=-6.0 ° Focal Depth=19 mm
RECEIVE:
Start=1 Aperture=32
Incidence Angle=-6.0 ° Focal Depth=19 mm
Inspection Parameters:
Min Angle=-30.0 ° Max Angle=30.0 ° Angle Increment=1.0 °
Doc No: | ||
Revision No: 01 |
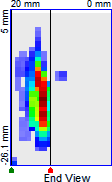
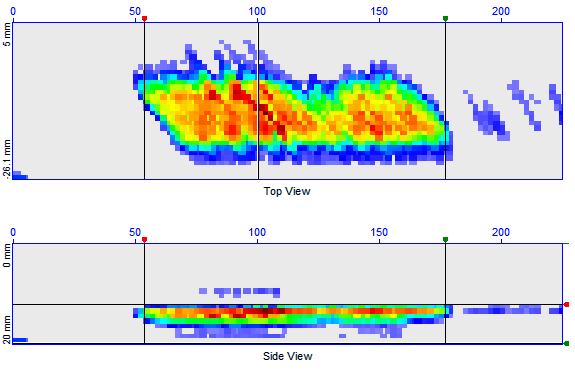
ISONIC 2010

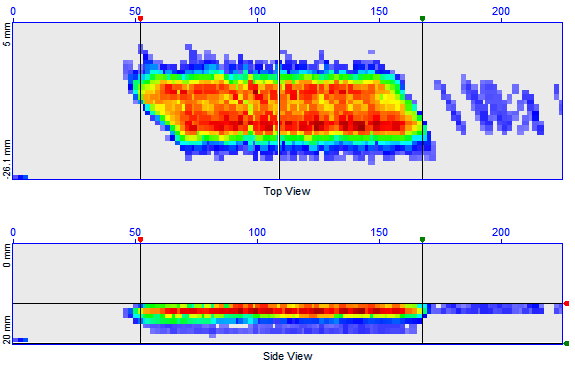
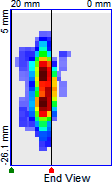
 Inspection Report – Scan 1

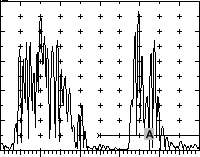
Length
Lr = 53.6 mm Lg = 176.7 mm
∆L = -123.1 mm
Height
Dr = 12.2 mm Dg = 20.0 mm
∆D = -7.8 mm
Doc No: | ||
Revision No: 01 |
ISONIC 2010

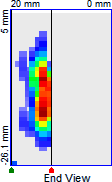
 Inspection Report – Scan 2

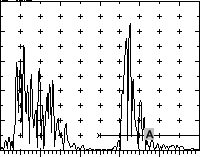
Length
Lr = 52.0 mm Lg = 167.3 mm
∆L = -115.4 mm
Height
Dr = 12.0 mm Dg = 20.0 mm
∆D = -8.0 mm
Doc No: | ||
Revision No: 01 |
ISONIC 2010
 Inspection Report – Scan 3
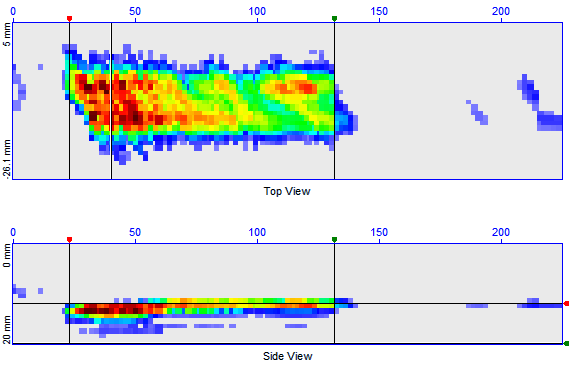

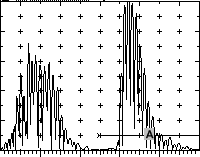
Length
Lr = 22.9 mm Lg = 131.3 mm
∆L = -108.4 mm
Height
Dr = 12.0 mm Dg = 20.0 mm
∆D = -8.0 mm
 Inspection Report – Scan 1
 Inspection Report – Scan 2
 Inspection Report – Scan 3

Responses