The Ultimate Guide to Phased Array Ultrasonic Scanning of Pipe Welds
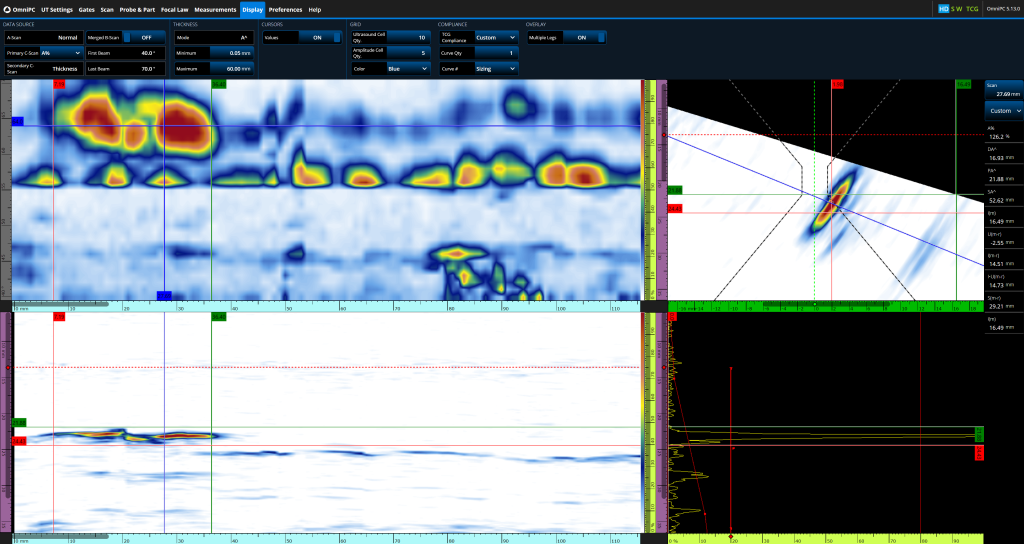
In the realm of Non-Destructive Testing (NDT), Phased Array Ultrasonics has emerged as a groundbreaking technology. It offers unparalleled advantages in evaluating the structural integrity of materials, components, and most importantly, welds. This article aims to provide a comprehensive guide to the importance of full circumference scanning in pipe weld inspections using Phased Array Ultrasonics.
The Evolution of NDT
Non-Destructive Testing has come a long way from its rudimentary methods like visual inspection and dye penetrant testing. The advent of Phased Array Ultrasonics has revolutionized the field, offering high-resolution imaging and precise measurements. Unlike traditional ultrasonic testing, Phased Array technology allows for the electronic adjustment of the ultrasonic beam, providing a more comprehensive and accurate evaluation.
Why Full Circumference Coverage is Crucial
In industries like oil and gas, aerospace, and construction, the integrity of pipe welds is paramount. A faulty weld can lead to catastrophic failures, endangering both human lives and the environment. Therefore, ensuring full circumference coverage during inspection is non-negotiable. It eliminates the risk of ‘blind spots,’ ensuring that every millimeter of the weld is scrutinized.
Understanding Phased Array Ultrasonics
Phased Array Ultrasonics is based on the principles of wave physics and constructive interference. A phased array probe consists of multiple small ultrasonic transducers that can be pulsed individually. By varying the timing of these pulses, the ultrasonic beams can be steered, focused, or dispersed, allowing for a more detailed inspection than traditional methods.
Calculating Circumference for Different Pipe Sizes
Accurate measurements are the cornerstone of reliable inspections. Below is a list of circumferences for pipes ranging from 2 inches to 50 inches, calculated in millimeters:
| Diameter (inches) | Circumference (mm) |
|---|---|
| 2 | 159.52092 |
| 3 | 239.48918 |
| 4 | 319.45744 |
| 5 | 399.42570 |
| 6 | 479.39396 |
| 7 | 559.36222 |
| 8 | 639.33048 |
| 9 | 719.29874 |
| 10 | 799.26700 |
| 11 | 879.23526 |
| 12 | 959.20352 |
| 13 | 1039.17178 |
| 14 | 1119.14004 |
| 15 | 1199.10830 |
| 16 | 1279.07656 |
| 17 | 1359.04482 |
| 18 | 1439.01308 |
| 19 | 1518.98134 |
| 20 | 1598.94960 |
| 21 | 1678.91786 |
| 22 | 1758.88612 |
| 23 | 1838.85438 |
| 24 | 1918.82264 |
| 25 | 1998.79090 |
| 26 | 2078.75916 |
| 27 | 2158.72742 |
| 28 | 2238.69568 |
| 29 | 2318.66394 |
| 30 | 2398.63220 |
| 31 | 2478.60046 |
| 32 | 2558.56872 |
| 33 | 2638.53698 |
| 34 | 2718.50524 |
| 35 | 2798.47350 |
| 36 | 2878.44176 |
| 37 | 2958.41002 |
| 38 | 3038.37828 |
| 39 | 3118.34654 |
| 40 | 3198.31480 |
| 41 | 3278.28306 |
| 42 | 3358.25132 |
| 43 | 3438.21958 |
| 44 | 3518.18784 |
| 45 | 3598.15610 |
| 46 | 3678.12436 |
| 47 | 3758.09262 |
| 48 | 3838.06088 |
| 49 | 3918.02914 |
| 50 | 3997.99740 |
Preparing for the Scan
Before initiating the scan, several preparatory steps are essential. These include safety measures like ensuring the work area is free from hazards, and technical preparations like calibrating the equipment and setting up the scanning parameters.
The Scanning Process
A typical Phased Array Ultrasonic scan involves the following steps:
- Calibration: Calibrate the equipment according to the material being inspected.
- Scanning: Slowly move the probe around the weld, ensuring full circumference coverage.
- Data Collection: The data is collected in real-time and can be visualized on a screen.
- Analysis: Post-scan analysis to interpret the results.
Post-Scan Analysis
Interpreting the results of a Phased Array Ultrasonic scan requires expertise. Various software tools can assist in this, providing 2D and 3D visualizations of the weld and highlighting any defects or inconsistencies.
Benefits of Full Circumference Coverage
- Enhanced Accuracy: Eliminates the risk of false negatives.
- Comprehensive Inspection: Ensures that the entire weld is inspected.
- Quality Assurance: Adhering to this best practice enhances the reliability of the inspection.
Industry Applications
Phased Array Ultrasonics is widely used across various industries:
- Oil and Gas: For inspecting pipelines and offshore rigs.
- Aerospace: In the maintenance of aircraft.
- Construction: For ensuring the structural integrity of buildings and bridges.
Future Trends
The future of Phased Array Ultrasonics is promising, with ongoing research aimed at integrating Artificial Intelligence for data interpretation and developing portable, more efficient equipment.
Conclusion
Phased Array Ultrasonic scanning of pipe welds is not just a recommendation but a necessity for ensuring the highest level of inspection accuracy. By adhering to best practices like full circumference coverage, professionals can significantly improve the quality and reliability of their inspections.
Join the Conversation on NDT Inspect
Are you interested in diving deeper into the world of Phased Array Ultrasonics? Look no further than NDT Inspect, your one-stop platform for all things related to Non-Destructive Testing.
Phased Array Ultrasonics Group
We have a dedicated group where professionals, students, and enthusiasts can come together to discuss the latest trends, share insights, and solve problems. Whether you’re a seasoned expert or a beginner looking to learn, our Phased Array Ultrasonics Group offers a wealth of information and networking opportunities.
Phased Array Ultrasonics Forum
Our forum is a vibrant community where you can ask questions, share your experiences, and get answers from industry experts. From technical queries to career advice, the Phased Array Ultrasonics Forum is your go-to resource for anything and everything related to this advanced NDT method.
Why Join NDT Inspect?
- Expert Opinions: Get advice from professionals in the field.
- Latest News: Stay updated on the newest technologies and methodologies.
- Networking: Connect with like-minded individuals and grow your professional network.
Don’t miss out on this opportunity to enhance your knowledge and skills in Phased Array Ultrasonics. Join NDT Inspect today and be a part of our growing community!


Responses