Time of Flight Diffraction (ToFD)
Welcome to [NDT Inspection Portal]’s time of flight diffraction (ToFD) group, a place for professionals... View more
What is ToFD?
What is ToFD?
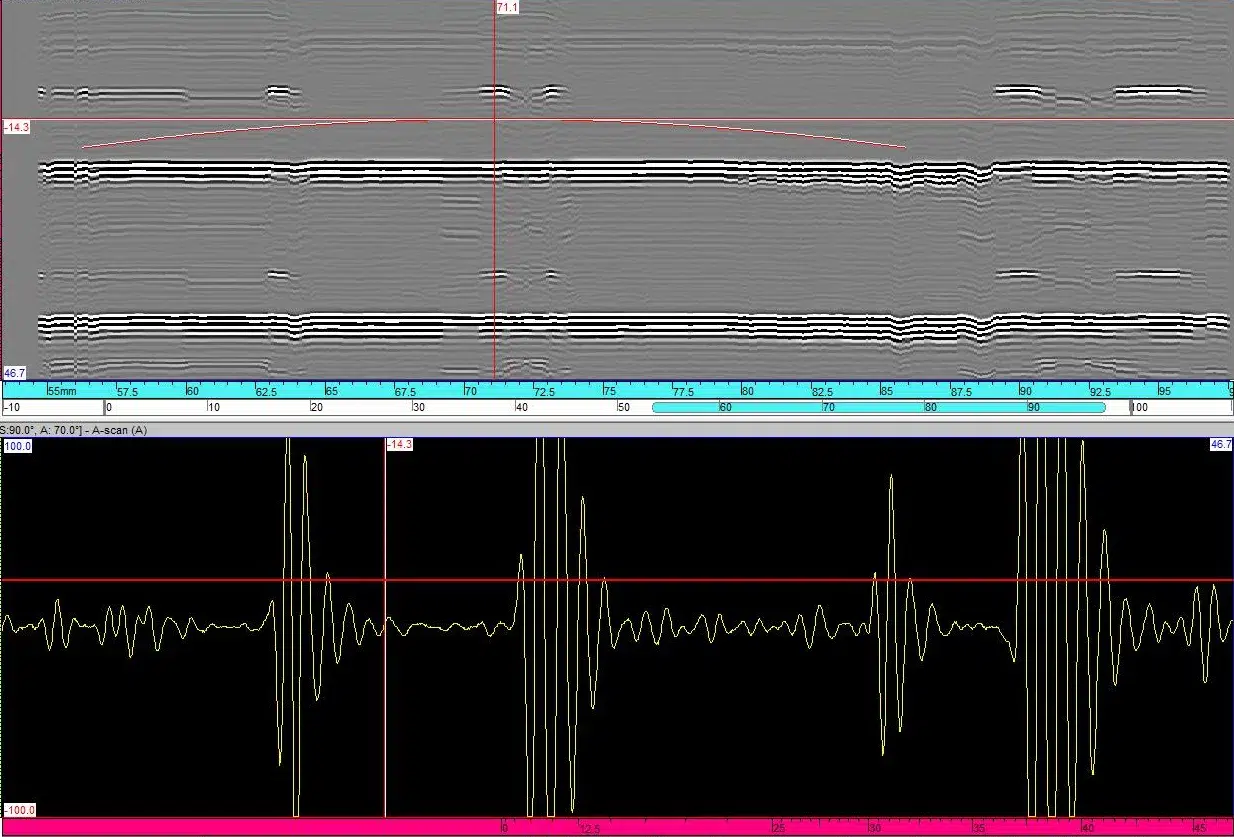
The ultrasonic TOFD method uses the defect diffraction echo to detect the defect and the arrival time of the echo to characterize the defect information. This method has a higher precision and immunity to interference than the conventional ultrasonic methods used for weld seam testing. Results of discussion 41 Laser ultrasonic tofd detection signal (Fig. 5) Simulated echo signal (A), ultrasonic longitudinal wave signal (B), surface wave signal (C), defect at the upper end of the diffraction wave signal, (D) defect at the lower end of the diffraction wave signal and (E) lower reflection wave signal (C).
Time-of-Flight Diffraction (TOFD) is a non-destructive, high-performance testing technique (NDT) used to determine the size of cracks, slag fusion faults and other weld design faults. It is a method of ultrasonic testing, which is the most sensitive and accurate method for non-destructive testing of weld defects. TOFD is used in a variety of applications, but its primary application is the rapid welding of circumferential and axial welds (also known as vertical TOFD scanning).
As part of the Ultrasonic Testing family, the non-destructive time flight diffraction (TOFD) method provides a precise solution for fault detection and sizing, pre-weld testing and maintenance testing. TOFD is a fast and reliable inspection method that can detect cracks and defects and monitor them over time.
It offers a fast weld inspection with excellent fault detection, dimensioning and capacity.
This method is more reliable than conventional X-ray pulses, manual UT ultrasonic tests or automated UT welding tests. Parallel to this setup, TOFD investigates the nature of the wide divergent beams used in the test by examining the entire volume of welded metal heat-affected zones adjacent to the base material in a single scan.
Ulasonic welding monitoring is performed by fixed probe arrays with the shear wave time of flight diffraction data to detect weld cracks.Ultrasonic monitoring of corrosion, erosion and general wall thickness processes can be performed by periodic 0-degree L wave wall thickness measurements with single probes, single probes or scanning arrays of probes.
Ulasonic Corrosion Mapping provides quantitative information on tank plate corrosion, welding conditions and certain internal coatings and is an invaluable tool. Ultrasonic tests can also be performed on welds, welds, pipelines, pressure vessels, clothing materials, storage tanks and structural steel.TOFD offers greater accuracy in measuring critical wall sizes and cracked defects. It is performed with longitudinal waves as the primary detection method. TOFD has proven to be more accurate in the size and magnitude of defects than conventional pulse echo techniques based on echo amplitude.
This technique is achieved by placing two probes (transmitter and receiver) on both sides of the welds in the joint area to be examined. Ultrasonic TOFD inspection places two probes on each side of a weld and transmits and receives ultrasonic waves.This allows the technician to determine the fault location, length and height.
A probe, the so-called transmitter, sends ultrasonic waves from the top of the welded connection to the back of the connection. These waves are then collected by the other probe, also known as the receiver. Two probes are used for the arrangement of transmitter and receiver, whereby the transmitter transmits ultrasonic waves obliquely into the material and the receiver picks up the bent signal if a defect is present.
In the TOFD system, a pair of ultrasonic probes sit on opposite sides of the weld seam.One of the two ultrasonic probes emits a signal that travels through the volume of the entire weld and is picked up by the other probe. At the time of flight diffraction (TOFD), the probes are used to sit on the opposite side of a welded joint to the desired area.
By analysing the difference in jet flight time between the transducer and the receiver, the instrument can see the size and location of the defect or defect in the image.A TOFD can be used to diffract signals to detect defects that do not affect geometry, making it useful for detecting volumetric and planar errors.
TOFD has been validated as one of the most effective techniques for locating size discontinuities in ferritic welds. Although they are not often used for welds, the Flight Diffraction Time (TOFD) is effective in detecting defects such as cracks, missing melt and spatter inclusions.NDT technicians use a combination of PAUT and TOFD scanning technology to achieve fast and precise scans of welded pipes and other critical metal components. The use of TOFD and PAUT is mutually reinforced to increase detection probability and increase the time required for inspection and the number of inspection personnel to increase during scans.
TOFD is a technique to see whether the pulser (outer surface) or the inner surface (outer surface of the receiver) has errors in the data in the proportional sense.It can pick up clues regardless of orientation, but the best detections are volumetric indications (phase alignment pulses and echoes) and ultrasonic failures (scattering and absorption of ultrasonic signals).
Time-of-flight diffraction (TOFD) differs from conventional pulse-echo ultrasound technology in that it depends on the diffraction energy and the reflected energy compared to form the signal height and amplitude.The amplitude of the TOFD used for the flight time of an ultrasonic pulse is determined by the position and size of the reflector.
The theory behind the TFD method is that ultrasonic waves that encounter a defect propagate along the workpiece.In addition to generating reflected waves from the defect, diffraction waves are generated at the top and bottom of the defect.
Ultrasound technology such as conventional pulse-echo ultrasound or phased array ultrasound can cover the TODF dead zone between the top and bottom of a piece during inspection.
Sorry, there were no replies found.
Log in to reply.